
Making a Dragonback Ring
Recently, a reader of Advanced Chain Maille Jewelry Workshop asked me for some clarification on how to construct the Dragonback Ring. I prepared some additional information to go along with the instructions in the book. I’m sharing it here, hoping other readers may also find it helpful.
 1. Start with a piece of E41.
If you already know that the piece of E41 is the correct size, then you can join the ends to form a circle now. If not, work flat for a while, as adding the HP3 edging to the E41 will shorten the length of the E41 piece. The flat method will be shown here.
 2. As described on pages 92-93 of Advanced Chain Maille Jewelry Workshop, weave HP31 along the top edge of the E41 piece. Don’t work from end to end. Leave a bit unworked on each end so that you can easily add to the length of the E41 piece if necessary. This also makes it easier to join the ends.
 3. Repeat step 2 on the bottom edge of the E41 piece
 4. Join the ends of the E41 piece to form a ring.
 5. Finish the HP31 edges on the top and bottom of the piece.
 6. As described on page 94 (steps 2 and 3) of Advanced Chain Maille Jewelry Workshop, you will “zip up” the center of the weave, connecting the top HP31 edge to the bottom HP31 edge.
NOTE: Working in this manner, the Dragonback ridge will begin to form on the inside of the ring. Therefore, at some point, you will need to turn the ring inside out. As you continue zipping up the center, the weave will get tighter. If you zip up the entire length of the ring from the outside, it will be too tight to turn inside out. Therefore, work as far as you can on the outside (test as you go) and then turn the ring inside out when necessary.
 7. Finish zipping up the ring, working from the inside of the band. This will become more difficult as you progress.
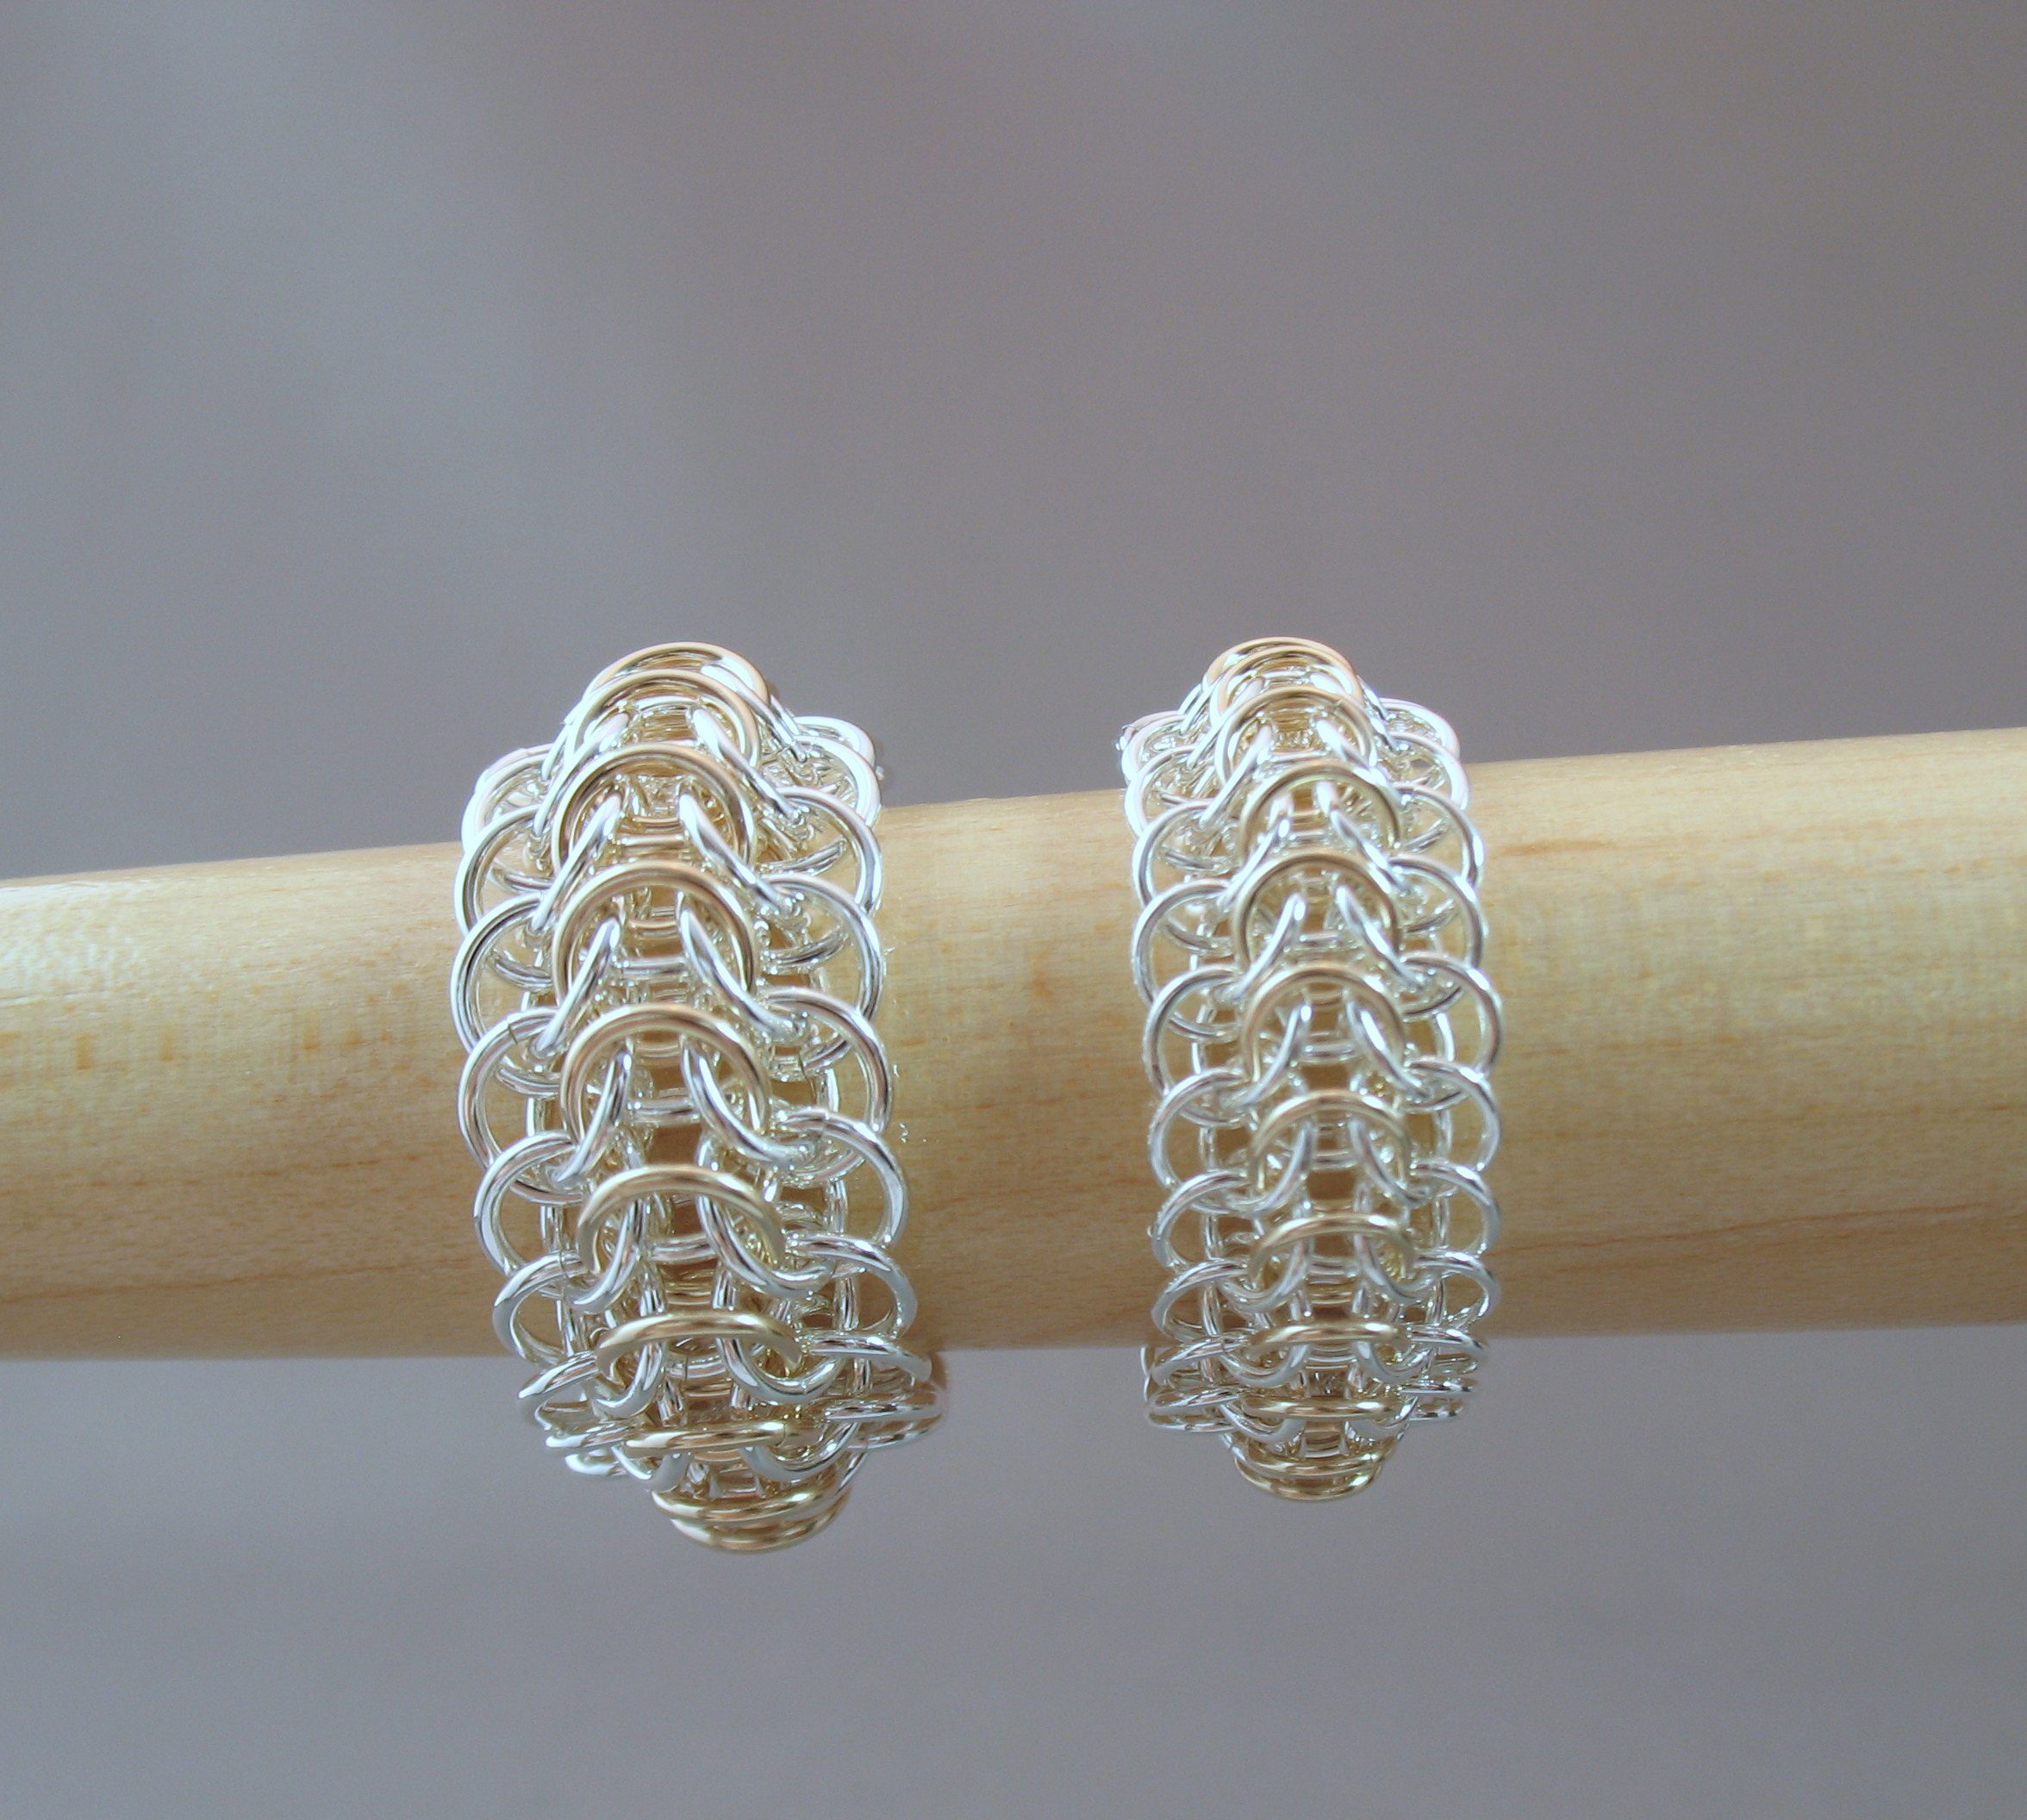
 When the ring is fully zipped, you are finished. The ring should look like the photos above.
Click here to download these instructions as a PDF.