
Tiny Scale Comparisons (Part 3)
Click here to read Tiny Scale Comparisons Part 1.
Click here to read Tiny Scale Comparisons Part 2.
I was excited to see these pretty new tiny scale colors released just in time for spring. These new tiny scales are thicker and are made by the same Canadian company that makes the original thinner tiny scales. Therefore, they have the same dimensions and the same size hole. As stated in Part 1 of this blog, the difference between these and the original tiny scales is that they are punched out of a thicker metal sheet. In addition, the holes in the yellow scales are aligned a bit differently from the holes in the pink scales. These little differences wouldn’t matter much if using larger scales and jump rings, but when working with very small materials, minute differences can have a big impact on your results.
NOTE: I completed each sample piece using the same black ice jump rings to cut down on the number of variables. Be aware that there can be slight differences in the various colors of anodized aluminum jump rings (of the same size), that can further contribute to unexpected results, no matter which tiny scales you use.

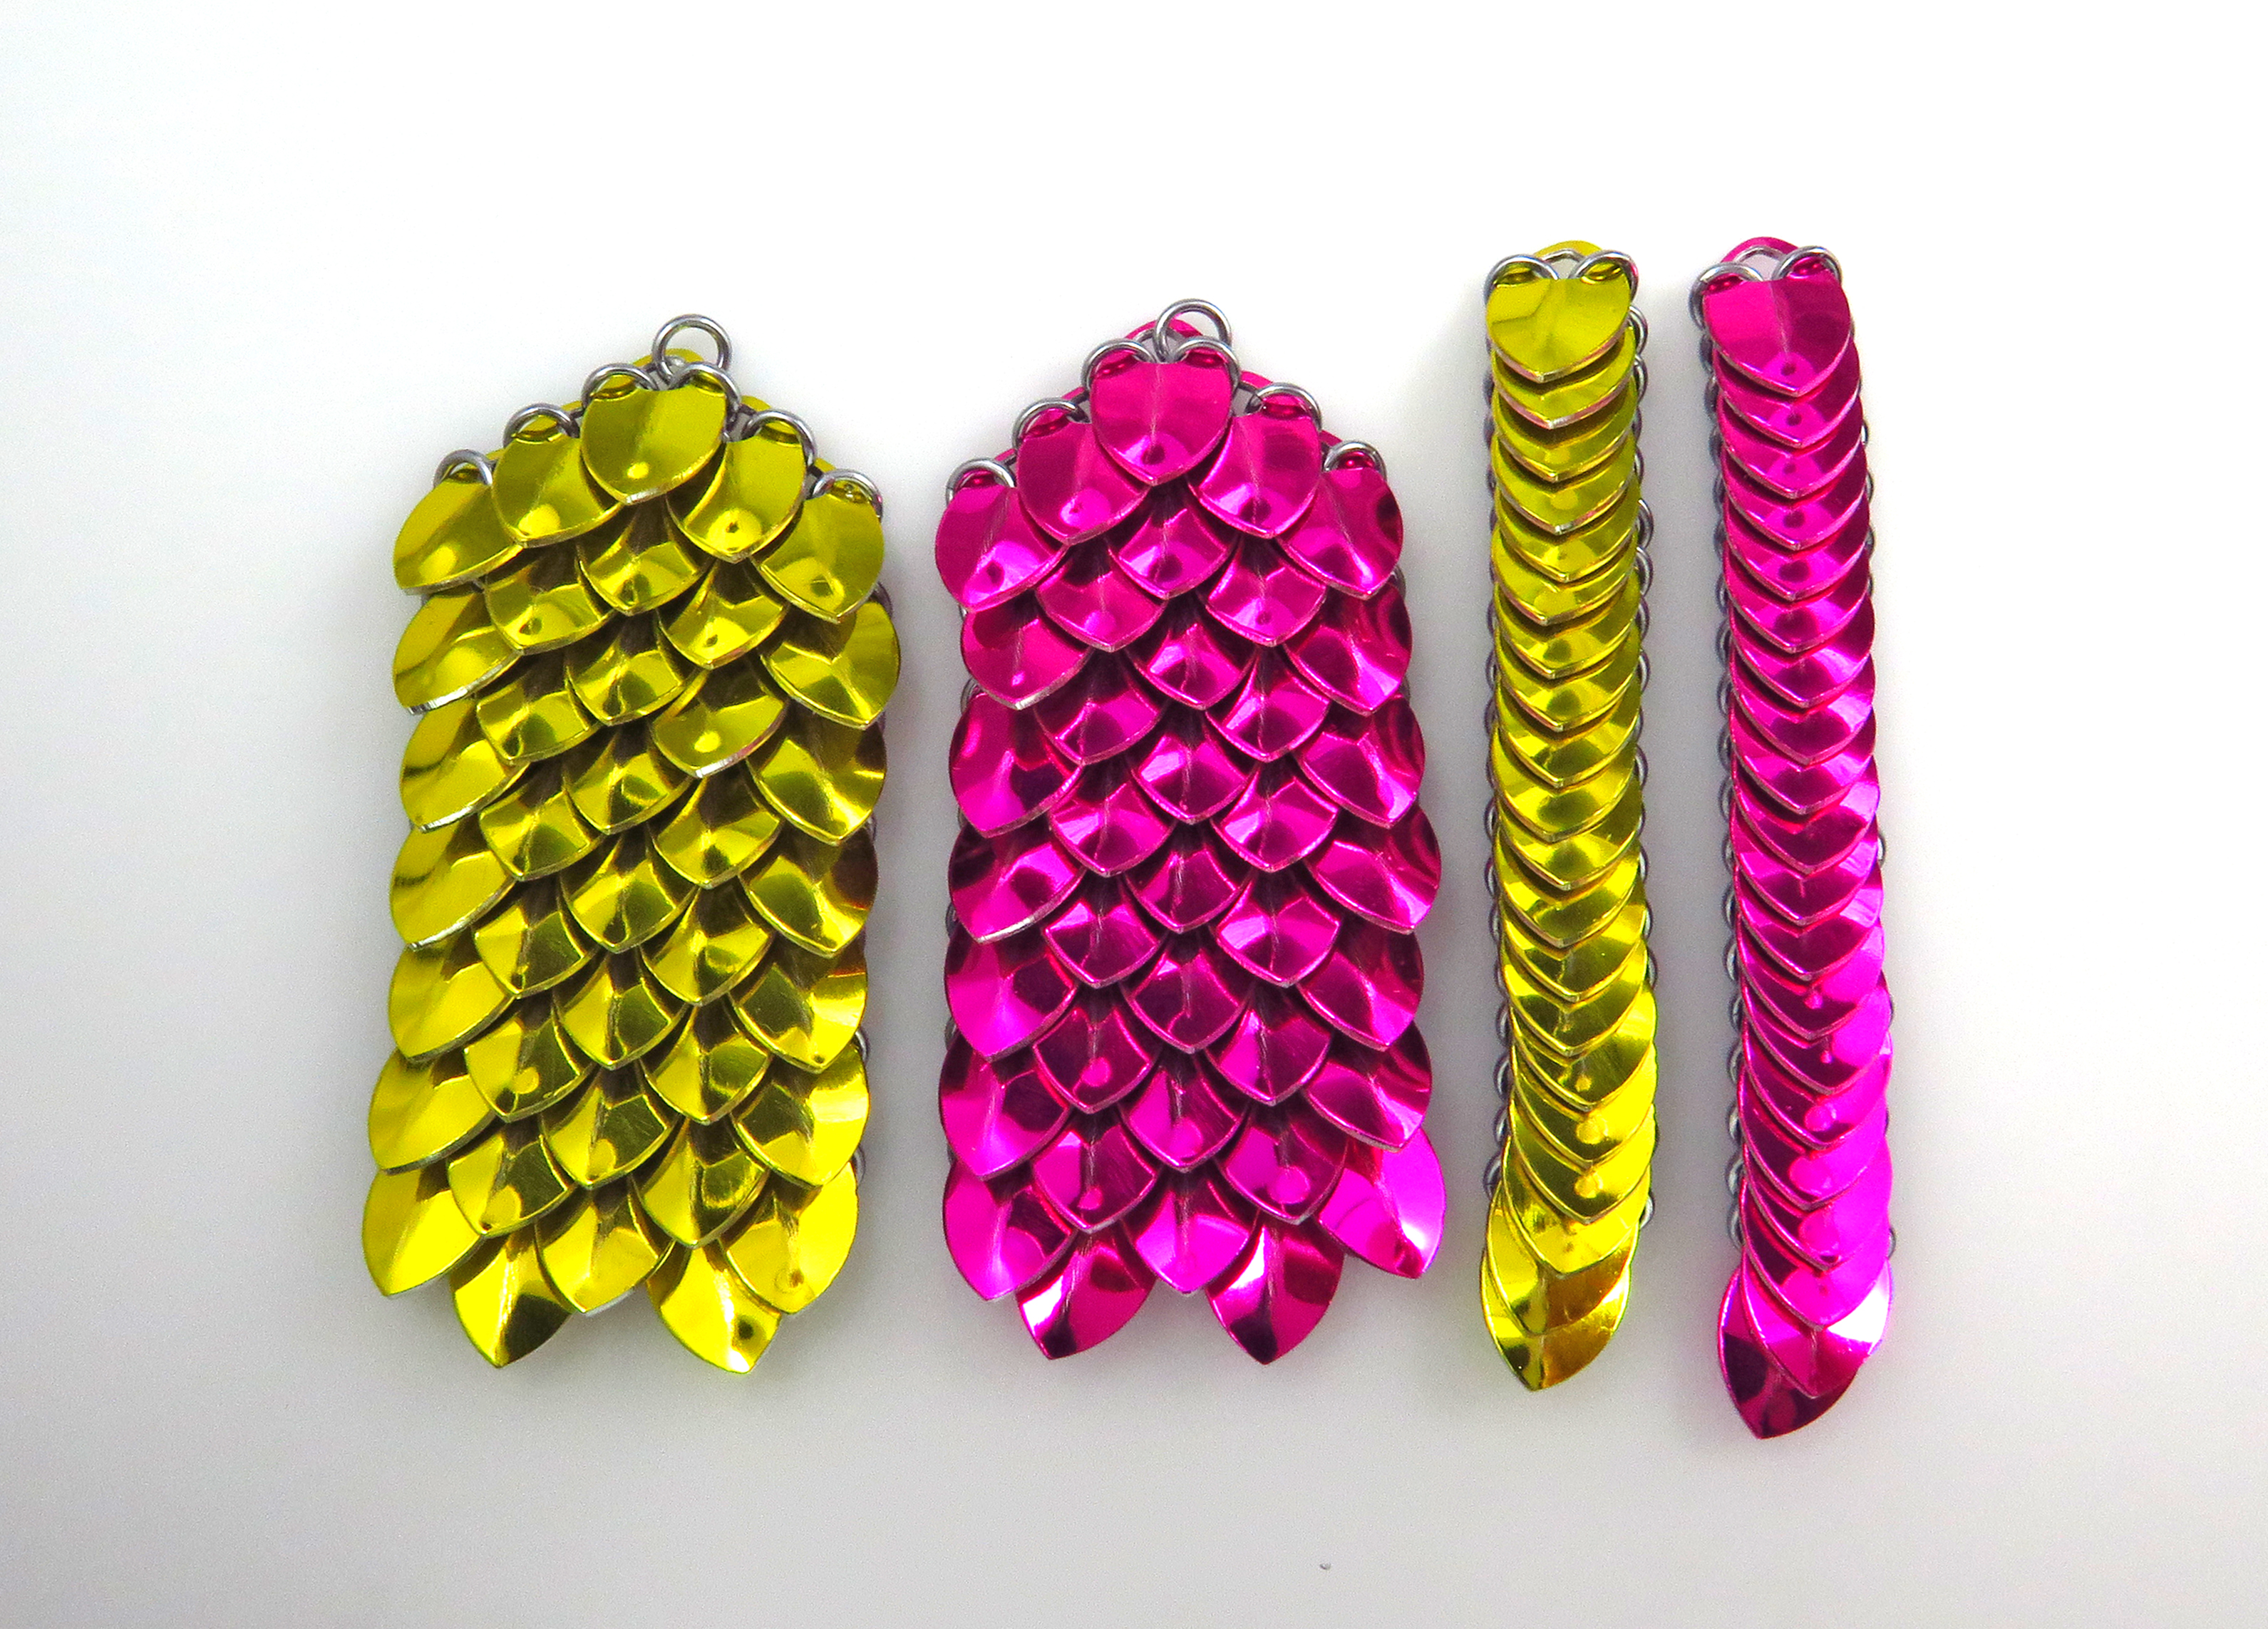
First, I wanted to know if I could weave a basic linear scale chain and a basic staggered sheet with these tiny scales and the usual 20g 7/64”id jump rings, something that I was unable to do with the Fire Mountain Gems tiny scales. The answer is yes and yes! However, the devil is in the details. Here are my observations:

When working with these simple forms, I noticed slight differences in the drape and flexibility of the pieces. In the photo above, the center piece is made with the original tiny scales. The two pieces on the left were constructed with the usual size jump rings. You can see that the tiny scales in these pieces are slightly raised. In addition, the pieces are a bit shorter in length than the original. The pieces were adequately flexible, but not quite as flexible as the original. I made two other pieces (right) using jump rings with a slightly larger inner diameter (1/8”). These pieces are closer in length to the original. The weave is a little looser than the original. To keep the edges neat, I had to take extra steps (above the usual) to stabilize the sides of these two pieces (this will be the subject of a future blog post).
Next, I decided to try to make a few pieces based on some of my tutorials, which were designed for the original tiny scales. I wanted to see how the new tiny scales would behave when constructing more complex forms. This is when things got interesting.

I started with my Spiral Earrings, which are based on the simple linear scale chain. To take the form from a straight linear scale chain to a spiral, I discovered that I could not use a linear scale chain woven with the new tiny scales and usual size (7/64”id) jump rings. The chain was too tight to weave in the additional jump rings to form the spiral. The new earrings needed to be built using 1/8”id jump rings. I feel that I was able to successfully capture the spirit of the original earrings using the new tiny scales, although they are not exactly the same. You can see that the new earrings are longer than the original, and the spirals are not as tight as the original. If you compare the pink to the yellow, you will notice slight differences between those two pieces as well (due to the slightly different alignment of the holes). The pink spiral is longer and not as tight as the yellow.

I encountered the same issues when trying to duplicate my S-Shaped Earrings. Not only did I need to construct the new earrings with 1/8”id jump rings, I also needed to change the gauge of the large jump rings from 16g to a thinner gauge (18g). The pink and yellow earrings are a bit longer than the original. Although I prefer the original, I do feel that the new tiny scales produce an acceptable result here.

Next, I experimented with my Tiny Scale Pendant. The two pendants on the left were made using the usual size jump rings to connect the new tiny scales, but I had to use a thinner gauge for the large jump ring at the top. If you compare those two pendants to the original (frost color), you will see that the weave is tighter (it is also more rigid). The two pendants do not have the same graceful drape as the original. If you look at these two pendants closely, you will notice that the yellow is a tiny bit tighter than the pink, due to the slight variation in the hole alignment. I tried a third pendant (yellow, right) using 1/8”id jump rings to connect the tiny scales and the usual size large jump ring at the top. You can see that this pendant does not hold its shape as well. If you look closely, you can see that the weave is loose and some of the holes in the tiny scales are in view. The “Goldilocks” pendant is the pendant using the original frost tiny scales (not too tight, not too loose, but just right).

The next pattern I attempted was my Flower Pendant. The original is on the left. All three pendants were made with the usual size jump rings. When constructing the pink and the yellow flowers, I was unable to weave past step 8 in the tutorial, as the weave became too tight when using these thicker tiny scales. For the pink flower, even though the weave was tight, the structure was not quite as firm as I would have liked. I had to improvise to squeeze a few more jump rings in at the back in an attempt to alleviate that issue (the yellow was too tight for me to do the same). You can see that the petals in the pink pendant do not lay as flatly as in the original, due to the tightness of the weave. The yellow flower is tighter than the pink (due to differences in hole alignment). All of the petals in the yellow flower are pulled upward.

I tried to make another yellow flower using 1/8”id jump rings, but the pendant was too loose. I added some extra jump rings around the center, and I added a couple of extra rows on the back, but I could not get the result I wanted.
 Above is a picture of the flower pendants hanging as you would wear them. The original on the left holds its shape and hangs nicely. The pink flower in the center holds its shape fairly well, but you can see that there is a tight spot at the top where I added the ring to connect the bail. The yellow flower on the right is the one made with the 1/8”id jump rings. You can see that it is loose and does not hold its shape well. For this pattern, the original scales produced the best result.
The take away from all of this, is that when working in a small scale, minor variations in materials can have a big impact on the outcome of your project. Whether you’ve been using my patterns or making your own designs using the original tiny scales, be prepared to make some changes when working with these new tiny scales. You may need to use different jump ring sizes to produce the result you desire. You may need extra or fewer jump rings. You may need to vary your weaving method. Since the new tiny scales are not exactly the same as the originals, you will not achieve the exact same result with these new tiny scales. You can attain comparable results in many instances. It all depends on the project. Have fun experimenting!